Thursday, June 30, 2011

Organized Chaos part 3 - POP TARTS!!!


Strawberry “POP TARTS”
When I made this recipe yesterday I thought I could just use a small square cookie cutter. They still turned out but I didn’t have a lot of room for the preserves. So, I recommend following the recipe and cutting them to 5x3 inch rectangles for more room in the center. And, per my husband’s recommendation, I topped with icing and powdered sugar.  They were good!

This is an EASY treat to make so, no excuses people!!
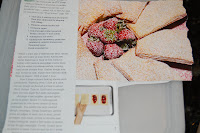
I think this recipe is from Bon Appetit

right before baking
yummy!
even yummier!


2 cups plus 2 tablespoons all purpose flour plus additional for shaping and rolling
1 teaspoon salt
1 teaspoon sugar
2 sticks chilled unsalted butter, cut into ½ inch cubes
4 tablespoons ice water
12 tablespoons strawberry preserves
Powdered sugar
Fresh strawberries

Whisk 2 cups plus 2 tablespoons flour, salt, and sugar in large bowl. Add butter. Using fingertips or back of fork, blend in butter until mixture resembles coarse meal. Add ice water by tablespoonfuls, tossing until moist clumps form. Gather dough into ball. Divide in half; shape each half into disk. Wrap in plastic. Chill at least 1 hour.

Line 2 large rimmed baking sheets with parchment. Working with 1 disk at a time, roll out dough on floured surface to about 13x11 inches. Trim to 12x10 inch rectangles, then cut into eight 5x3 inch rectangles.

Arrange 4 rectangles, spaced apart on each sheet. Spoon 1 ½ tablespoons preserves on each rectangle. Top preserves with second dough rectangle. Using fingertips gently press all edges of each tart to seal; press all edges with fork to double-seal. Using toothpick, poke a few holes in center of top dough. Cover; freeze tarts on sheets at least 2 hours and up to one week.

Bake uncovered frozen tarts at 375 for 25-30 minutes.

Wednesday, June 29, 2011

Organizing Chaos Part 2- Raspberry Tart with Pistachio Crust


Raspberry Tart with a Pistachio Crust

The picture of this tart makes my mouth water every time I flip through my recipe book. Needless to say, I’ve wanted to make it for a while now. I don’t know what magazine I pulled this out of but the recipe is from Jennifer McCoy of Craft in NYC.

Pastry
2 sticks (226 grams) unsalted butter, softened
¼  (60 g) cup sugar
Pinch of salt
1 (6 g) teaspoon pure vanilla extract
1 (20) large egg yolk
1 1/3 (218 g) cups all-purpose flour
2 ½ (56 g) ounces unsalted pistachios, finely ground (1/2 cup)

Filling and Topping

2 (486 g) cups whole milk
1 (6 g) vanilla bean, split and seeds scraped
Pinch of salt
½ (120 g) cup sugar
¼ (20 g) cup cornstarch
2 (100 g) large eggs
4 (56 g) tablespoons unsalted butter, softened
2 to 3 half-pints of raspberries
Finely chopped unsalted roasted pistachios, for garnish


1.       Make the pastry: In a standing electric mixer fitted with the paddle, beat the butter with the sugar and salt at medium speed until creamy. Add the vanilla and egg yolk and beat until smooth. Add the flour and pistachios and beat just until incorporated. Scrape the pastry onto a sheet of plastic wrap. Flatten the pastry into a disk, wrap in the plastic and refrigerate until firm, about 30 minutes.
2.       Preheat the oven to 350. Roll out the pastry between 2 sheets of plastic wrap to a 13-inch round. Remove the plastic and ease the pastry into a 10-inch fluted tart pan with a removable bottom; trim the overhang and patch any tears. Refrigerate the pastry until firm, about 10 minutes.
3.       Line the tart shell with parchment paper and fill with pie weights or dried beans. Bake in the center of the oven for 30 minutes. Remove the parchment and weights and bake for 15 minutes longer or until golden and cooked through. Let cool completely.
4.       Meanwhile, make the filling and topping: In a medium saucepan, combine the milk with the vanilla bean, seeds and salt and bring to a boil. In a large bowl, whisk the sugar with the cornstarch and eggs. Gradually whisk in ½ cp of the hot milk. Scrape the mixture into the saucepan and cook over moderate heat whisking constantly, until very thick, about 4 minutes. Remove from the heat and whisk in the butter. Strain the pastry cream into a bowl, press a piece of plastic wrap directly onto the surface and refrigerate until chilled, about 1 hour.
5.       Spread the pastry cream in the tart shell and arrange the raspberries on top; sprinkle with the pistachios to garnish. Refrigerate for at least 1 hour before serving.
Make ahead: The pastry cream can be refrigerated for 3 days. The tart shell can be stored at room temperature for 2 days.

Happy 4th of July!

Patriotic Cookies available today at Casey's Market and DeVries. Get them before they're gone!


Saturday, June 25, 2011

Organizing Chaos Part I - Strawberry-Rhubarb Pie


During the summer months I have to make the recipes that call for fresh fruit. So, after coming back from the LaGrange Farmers Market with fresh beautiful strawberries and a bunch of rhubarb, I decide on making a tart. How can I not?  I think there has to be a tart recipe in my mess somewhere, but after looking through, it turns out it’s a pie recipe.

Instead of using the store bought pie crusts, I opted to make tart dough and turn this thing into mini tarts.


Strawberry-rhubarb pie (adapted from Family Circle magazine June 2008)

3 cups fresh or frozen rhubarb pieces (about 1 lb)
3 cups trimmed and quartered strawberries (about 1 lb)
1 cup sugar mixed with ¼ cup cornstarch
1 tablespoon lemon juice

1.      Partially bake tart shell at 350 before you begin. Remove from oven then heat the oven to 400.
2.      In a large bowl, toss rhubarb, strawberries, sugar-cornstarch mixture and lemon juice. Let stand 5 minutes.
3.      Pour strawberry mixture into crust lined tart dish (I used tart pans with a removable bottom), leveling slightly.
4.      Bake at 400 for 50 minutes, covering edge of pie with foil if browning too quickly. Cool to room temperature.

Tart Dough (From Martha Stewart’s Baking Handbook)
6 tablespoons unsalted butter, room temperature
½ cup confectioners’ sugar
2 large egg yolks
1 ½ cups all-purpose flour
¼ teaspoon salt
2 teaspoons heavy cream

1.       In a bowl of an electric mixer fitted with the paddle attachment, combine butter and confectioners’ sugar. Mix on low speed until combined, about 2 minutes.
2.        Add egg yolks , and mix until incorporated, about 1 minute, scraping down the sides of the bowl as necessary. Add ¾ cup flour, and mix on low speed just until the flour is incorporated, about 30 seconds. Add remaining ¾ cup flour along with the salt and cream, and mix just until flour is no longer visible, about 1 minute.
3.       Turn out dough onto a piece of plastic wrap, and shape into a flattened disk. Wrap in plastic, and refrigerate for at least 2 hours or overnight. The dough can be frozen for up to 1 month; thaw overnight in the refrigerator before using.

Friday, June 24, 2011

Organizing Chaos


Every month I wait anxiously for my food magazines to come in the mail. They make me so happy.  After the kids go to bed I sit quietly and enjoy every page, reading all the recipes, imagining when I would have an occasion to make them. I look at the beautiful food photography, wishing I could take pictures of my cakes and cookies like that. I read each recipe and dog ear my favorite ones. I plan on making each recipe I dog ear.

I also happen to be one of those people who hate paper lying around. That’s not to say I don’t have paper lying around. I do. A lot of it. I have piles on the desk, on the kitchen table, on the kitchen island, on the stairs, and even in the master bathroom. But I do hate it.  So, after I’ve gone through each magazine and dog eared the recipes I love most, I rip out those recipes, place them neatly in a plastic protective binder sheet and throw away the magazine.  I feel good and ordinarily I would say this is a brilliant idea. I like to be organized. However, I’ve been doing this for quite a while now and I haven’t gotten around to making many of those recipes. The nice plastic binder sheets fill up 3 binders. While I have tried to organize them by cakes, pies, tarts, ice cream, other, etc., they are spilling over. Oh yes, did I mention all of those treasured recipes are desserts? 


So, in an effort to organize my dessert binder, I’m planning on making all of them, tasting all of them, take pictures of all of them, and then blogging about all of them. I reorganized the mess one last time and took a look at each recipe to see what I had and think about which ones I should start with. 


I hope you enjoy the blog posts and would love to hear your nice thoughts!